Whilst retro fitting the Aircon system, I’ve had a guy completely replace the drivers side leather bolster and foam on the Z3M seats along with sowing in a pair of new seatbelts guides. He’s made a great job of the bolster, dyeing black leather to blue. Given they are almost 100k miles old they have come up pretty well: (though I do look at my original seats which are in superb condition with a pang of regret).
I collected them last weekend and finally found time yesterday to clean and feed them with Hide Food, before swaping them over on to my original bases.

It is surprisingly easy to remove a seat from its base - it took me 10 minutes, removing 5 bolt/screws and detaching the two cables that allow the seat back rake to adjust.

Then, whilst separated, I decided to fit new bushes/washers in the Fore/Aft electric seat mechanisms - the originals tend to disintegrate over time allowing the seats to rock back and forth while driving.
Again, quite easy, once you work out how to extract the drive mechanism: after removing the large tork screw, which allows the long worm drive mechanism to be pulled out, the seat runner must then be slid back to allow the drive mechanism to tilt down 20 degrees, making it easy to remove.


Once out the rubber bushes in the mechanism are revealed.

My bushes/spacers were in much better condition than I expected, compared to those I found in the donor car’s bases: however as I had bought new replacements I decided to fit them now while I have the seats out.
The long threaded drive has to be removed from the adjuster block as it passes through the spacers: (remember to count how many turns it takes and rebuild later with the same number for both sides of the seat runners).


The original BMW spacer/bushes appear to be made of black rubber moulded as one U-shaped piece: mine are just beginning to break up.
New white individual spacers (that appear to be nylon) are readily available: they are a very tight fit. I gently hammered mine into position, being careful to tap each side, not the weak centre: others have sanded them down until easier to slide in. On the basis that you are doing this to stop the seats moving back and forth I felt “tight” was the way to go.
The most difficult part is the refitting of these driver mechanisms into the seat frame. The long worm drive shaft is driven by a square ended flexi drive, which has to be inserted into the ends of the long screw mechanisms.

The above photo, for illustration only, shows the two parts that must be joined: in practice this union has to be made inside the seat runners making it much more difficult to line up and insert.

The view through the hole is all that you have to work with. I found it useful to offer the shaft to the flexi drive outside of the runner and rotate it to get the squares to align, then feed it through the seat runner and use a flathead screwdriver to help guide the spring wire into the shaft end.
Also note the non threaded end of the worm drive shaft has to be pushed into the black rubber bushes to be fully seated. Once this part is complete reassembly is fairly straightforward.
One little tip to remember when reattaching the seat to the base is to connect the two seat back adjusting cables first: it’s not possible once the seat has been secured to the base (you know how I know!). The the rest is easy.

I have chosen to fit my facelift Z3M seats to my pre-facelift bases to retain the standard seat operating electric connections.
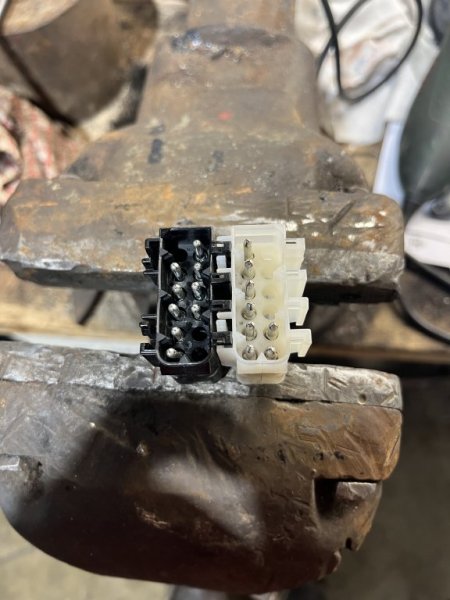
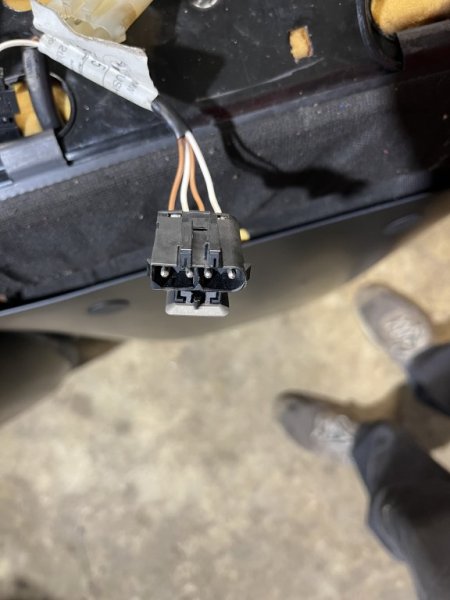
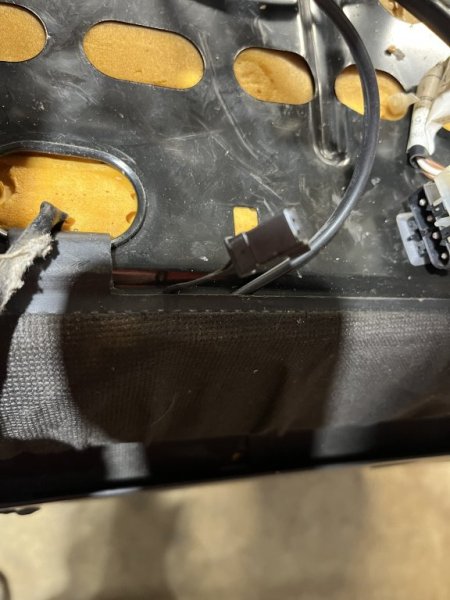
The only minor task left is to marry the facelift heated seat wiring to my existing loom wiring as they have different connectors.
Does anyone have, or know where I can obtain, two male 4 round pin connectors from a pre facelift heated seat, that I can swap onto my seats to make them totally original plug and play seats?
To connect to these female sockets in my loom.

I collected them last weekend and finally found time yesterday to clean and feed them with Hide Food, before swaping them over on to my original bases.
It is surprisingly easy to remove a seat from its base - it took me 10 minutes, removing 5 bolt/screws and detaching the two cables that allow the seat back rake to adjust.
Then, whilst separated, I decided to fit new bushes/washers in the Fore/Aft electric seat mechanisms - the originals tend to disintegrate over time allowing the seats to rock back and forth while driving.
Again, quite easy, once you work out how to extract the drive mechanism: after removing the large tork screw, which allows the long worm drive mechanism to be pulled out, the seat runner must then be slid back to allow the drive mechanism to tilt down 20 degrees, making it easy to remove.
Once out the rubber bushes in the mechanism are revealed.
My bushes/spacers were in much better condition than I expected, compared to those I found in the donor car’s bases: however as I had bought new replacements I decided to fit them now while I have the seats out.
The long threaded drive has to be removed from the adjuster block as it passes through the spacers: (remember to count how many turns it takes and rebuild later with the same number for both sides of the seat runners).
The original BMW spacer/bushes appear to be made of black rubber moulded as one U-shaped piece: mine are just beginning to break up.
New white individual spacers (that appear to be nylon) are readily available: they are a very tight fit. I gently hammered mine into position, being careful to tap each side, not the weak centre: others have sanded them down until easier to slide in. On the basis that you are doing this to stop the seats moving back and forth I felt “tight” was the way to go.
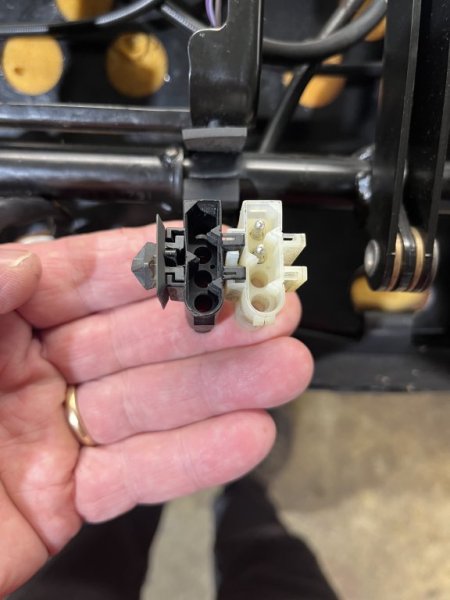
The most difficult part is the refitting of these driver mechanisms into the seat frame. The long worm drive shaft is driven by a square ended flexi drive, which has to be inserted into the ends of the long screw mechanisms.
The above photo, for illustration only, shows the two parts that must be joined: in practice this union has to be made inside the seat runners making it much more difficult to line up and insert.
The view through the hole is all that you have to work with. I found it useful to offer the shaft to the flexi drive outside of the runner and rotate it to get the squares to align, then feed it through the seat runner and use a flathead screwdriver to help guide the spring wire into the shaft end.
Also note the non threaded end of the worm drive shaft has to be pushed into the black rubber bushes to be fully seated. Once this part is complete reassembly is fairly straightforward.
One little tip to remember when reattaching the seat to the base is to connect the two seat back adjusting cables first: it’s not possible once the seat has been secured to the base (you know how I know!). The the rest is easy.
I have chosen to fit my facelift Z3M seats to my pre-facelift bases to retain the standard seat operating electric connections.
The only minor task left is to marry the facelift heated seat wiring to my existing loom wiring as they have different connectors.
Does anyone have, or know where I can obtain, two male 4 round pin connectors from a pre facelift heated seat, that I can swap onto my seats to make them totally original plug and play seats?
To connect to these female sockets in my loom.
Attachments
-
 86.4 KB Views: 259
 -
 79.9 KB Views: 261
Last edited:


")
 ) I wanted to retain the standard prefacelift electrical connections: but without any original pre facelift heated seats I did not have the required seat-side plug (or so I thought………).